Pebble.js Tutorial - An In-Depth Guide To Writing Pebble Apps Using JavaScript
05 Feb 2015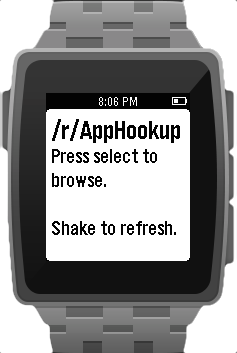
Apps for the Pebble smartwatch platform are traditionally written in C. A Pebble is a low-power computer with limited storage and memory. It does not come with a full-blown interpreter for Python or JavaScript. Hence, C was the only option for developers for quite some time.
Pebble.js, a framework for writing JavaScript applications was announced at JSConf 2014. It is mainly a framework intended to write apps that need an Internet connection to run. While it is not very limited in most ways, the framework may not be what you expect it to be. I’m writing this to clear up any confusion regarding the design of Pebble.js apps.
This article is a Pebble.js “getting started” for:
- Those trying to get into developing for Pebble but don’t know C
- Developers who are writing an app that inherently requires an Internet connection
- People who want to know the difference between C and JS apps, or just want to get started with an overview of the Pebble.js API.
I am not a Pebble.js master developer. At the time of this writing, I have written one Pebble.js app and published it on the app store. I just want to share my experience to make it easy for other beginners and perhaps clear out a few things that I had to dig around and learn.
This article is intended to be a deeper overview of Pebble.js and meant to complement the information in the official tutorial with a detailed explanation of actual code from an actual app available on the store.
Note: I assume prior programming knowledge, especially in JavaScript. Specifically, make sure you understand callback functions.
Who Should Use Pebble.js
Let’s get a few things out of the way first. Pebble.js is not intended to be a replacement for all C applications. To explain this, you should understand the three kinds of Pebble apps that currently exist (this includes watchfaces as well, becuase they are the same as apps in this regard):
- Completely standalone C apps that do not require any connection to the Internet or any configurable settings in the Pebble phone app.
- C apps with a PebbleKit JS extension. C apps cannot get location data or connect to the Internet on their own. They require a JavaScript component that is processed on the user’s phone. C apps with this PebbleKit JS component have access to all these features, plus extra storage, the ability to receive settings from the Pebble app and more.
- Pebble.js apps, with no C component, which behave like number 2 above, and are entirely written in JavaScript. All the processing is done on the phone, using the Pebble’s screen and vibration motor for output and buttons, compass and accelerometer for input.
Note: Because all the processing for a Pebble.js app is done on the phone, there can be a noticeable lag in UI elements, input and output in many cases. Also, since your app is constantly communicating with the phone for pretty much everything, it can drain more power. Besides this, the app will not function when the user is away from their phone.
Use Case
Pebble.js won’t replace C apps in its current state, but that does not mean you should not use it. Pebble.js is easier to use than the C SDK for apps that connect to the Internet for all or most of their functionality, like my app: AppHookup.
AppHookup is the official Pebble app for the /r/AppHookup subreddit, a place where people contribute app deals and discounts on all platforms. It queries the reddit API for the last 35 posts on the subreddit and displays them in an easily-readable fashion.
Pebble.js apps cannot function without a phone nearby. However, AppHookup cannot function without an Internet connection by design, so the user is not expected to use it without a phone around. Thus, Pebble.js’s biggest restriction does not apply to this particular app.
Writing A Pebble.js App
Let’s look into what the Pebble.js API provides you with. Then I will give you an overview of my AppHookup app. The official Pebble.js documentation covers all of the components of the SDK very well, but it is only generic documentation and there are few Pebble.js tutorials out there. In this post, I just aim to give you a basic overview that should be helpful if you’re just getting started.
CloudPebble
To write a Pebble.js app, go to CloudPebble, an amazing cloud-based IDE for writing Pebble apps. With it, there is no need to install anything on your computer. You can just write your code, hit the run button and the app is compiled and run on your watch pretty much instantly through your phone. The editor itself is great and it integrates with GitHub as well.
Anatomy Of A Pebble.js App
Since we are working with JavaScript, there is no main() function. The entry point into the app is the file itself. It starts executing any line it finds first at launch. In most cases, this should be the .show() function of any UI element.
Just like CommonJS or Node.js, Pebble.js allows us to require dependencies. So you can have a multi-file layout and have files include others as dependencies.
UI Elements
Pebble.js comes with several Window types built in and ready to use. This means that you can have scrollable/non-scrollable cards, menus and dynamic windows in your app without coding the underlying architecture for them. This is one of the smaller benefits of using Pebble.js over the regular SDK. For basic apps, there is no UI work required.
There are basically three types of Window elements, two of them pre-built and one dynamic:
Cardis just what it sounds like. It’s a pre-built, simpleWindowthat displays atitle,subtitleandbodythat you supply to it. It can be set toscrollableoptionally, and it resizes/cuts-off the text accordingly.Menuis a scrollable list of items. It is very similar to the main menu in your Pebble. You can have atitle, asubtitleand optionally, an icon for each item.Windowis a perhaps confusingly-named element. But it is exactly what it’s called. It’s a generic window and likely a parent of the other two. Just like with the C SDK, you can set go nuts with the design, placingElements (shapes, text, images) exactly as you want them to appear on it.
Note:
CardandMenuare pre-designedWindowelements, so you cannot set custom fonts or text sizes for them.
Accelerometer, Internet, Vibrations
Just like UI elements, there is an ajax module. It allows HTTP requests (GET, POST etc.), downloading JSON data and has optional async support. The documentation has sample code for it. You can also skip ahead in this article to see how I used it with reddit.
Pebble.js also allows us to get detailed accelerometer data using the Accel module. There are two ways to use it:
- Get raw data and parse manually using various functions.
- Detect taps/shakes. This one is done automatically and reported to your app if you expect it. (Hard) Taps are considered to be the same thing as a quick flick of the wrist.
Tip: Use the tap/shake API to add refresh functionality in your app!
Vibrations (Vibe module) are a great way to give feedback to the user to notify them of the completion of a task, like when new data is downloaded.
AppHookup App Overview
You can find all of this code and more in context at the AppHookup for Pebble GitHub repo.
Note: Some of the snippets in this post are adapted versions of the actual source code to make them easier to understand with less context.
The AppHookup app is built entirely over the pre-designed window elements included in Pebble.js. At the top of the file, I include the ui module:
var UI = require('ui');The title screen is generated using the following code:
var main = new UI.Card({
  title: "/r/AppHookup",
  body: "Press select to browse.\n\nShake to refresh."
});

main.show();
This is pretty much the entry point to the application. I make a new UI.Card element with a preset title and body. This automatically generates a card with the appropriate fonts. With just these lines of code, we have a fully functioning app with one title screen.
Just after this is shown, I query the reddit API for the last few posts from the AppHookup subreddit. While this is happening, I temporarily change the body of this card using:
main.body("Press select to browse.\n\nLoading posts...");It is changed back in the ajax callback function, which is executed after the ajax module receives data from reddit, like so:
ajax({ url: 'http://www.reddit.com/r/apphookup/new.json?sort=new&limit=35', type: 'json' },
  function(data) {
    redditResponse = data;  // Initialized earlier

    console.log('Received data.');
    Vibe.vibrate('short');

    main.body("Press select to browse.\n\nShake to refresh.");
  },  // End of success callback

  function(error) {
    console.log('Error receiving reddit data.');
    main.body("Could not download posts.\n\nShake to try refreshing again.");
  }   // End of error callback
);
Next, I have a listener for the ‘select’ button press on this screen:
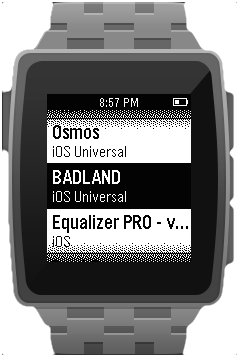
main.on('click', 'select', function(e) {
var appsList = parseApps(redditResponse);
var appMenu = new UI.Menu({
sections: [{
title: "Newest posts",
items: appsList
}]
});
appMenu.show();
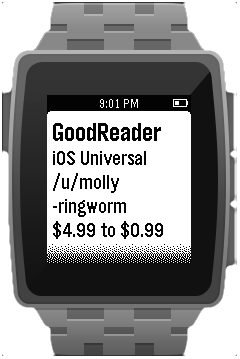
appMenu.on('select', function(e) {
var appDetails = new UI.Card({
title: e.item.title,
body: e.item.subtitle + '\n' + e.item.body,
scrollable: true
});
appDetails.show();
});
});There is quite a bit going on here, so I’ll step through it for a bit. When the select button is pressed, the parseApps function processes reddit’s response and generates an list that is passed into the UI.Menu constructor as you can see above. It is an array of JavaScript objects with a specific format. You can see this function below. Now the appMenu screen is ready and displayed. I only needed one section here, but you can add multiple if you want to segregate your menu items in the same menu.
Next, I add a listener for the ‘select’ button on a menu item. Then I read data back from the previously created JS objects, which the UI.Menu exposes. Each app gets its own UI.Card (with preset titles and bodies) when it is clicked on.
Check out the parseApps function, which returns an array of JS objects to pass into UI.Menu.
function parseApps(data) {
var items = [];
for (var i = 0; i < data.data.children.length; i++) {
if (data.data.children[i].data.is_self) continue;
var postTitle = data.data.children[i].data.title;
postTitle = postTitle.replace("&", "&");
postTitle = postTitle.replace("<", "<");
postTitle = postTitle.replace(">", ">");
var titleArray = splitTitle(postTitle);
var platform = titleArray[0];
var appName = titleArray[1];
var priceChange = titleArray[2];
var description = titleArray[3];
if (description === undefined)
description = "";
else
description = description + '\n\n';
var user = data.data.children[i].data.author;
items.push({
title: appName,
subtitle: platform,
body: '/u/' + user + '\n' + priceChange + '\n\n' + description
});
}
return items;
}Much of the above code is specific to the reddit API response, so you don’t need to think much about it. Here are a few things happening:
- I use the
replacefunction as a quick and dirty way of unescaping some of the common HTML characters in AppHookup posts. If anybody knows of a better way to do it, please post it in the comments. splitTitleis a function that uses regular expressions to parse AppHookup post titles. The regex was contributed by Thanasis Grammatopoulos from Stack Overflow. You can check it out in the app’s source, linked above.- After doing a bit of string manipulation to make corner-case stuff look pretty, I add a JS object to the array I shall be returning. Take note of the format. This is the array that is passed into the
UI.Menuconstructor.
Now here’s a final tidbit - basic accelerometer usage. It is possible to get full accelerometer data through Pebble.js, but interpreting this data is very involved because the data points are raw values of 3D movement on the x, y and z axes. We won’t delve into that in this article.
Throughout my app, I employ the accelerometer (specifically the accelTap event) to refresh reddit data. On the main screen and in the menu, I have listeners waiting for this event like so:
main.on('accelTap', function(e){
  console.log('Shake detected.');
  getPosts();
});
accelTap is a special, pre-built event that fires when the watch detects a firm tap or a shake of the wrist. This is the same motion as the one used to trigger the watch’s backlight. Put the snippet anywhere after main.show() and it should work. I added this after appMenu.show() to listen for the event on the menu screen too:
appMenu.on('accelTap', function(e) {
  console.log('Shake detected.');
  appMenu.hide();
  getPosts();
});
This one takes the user back to the main screen as it refreshes. My getPosts function even vibrates the watch after a successful refresh like so (in the Ajax success callback):
var Vibe = require('ui/vibe');   // Need to include this at the top
Vibe.vibrate('short');
Publishing A Pebble.js App
Once you have built your first app, the process of publishing it is very straightforward. Simply get the .pbw file from CloudPebble, capture a few screenshots, make some store graphics and fill out a form on Pebble’s dev portal. The requirements can be found on the site.
Your app should pretty much appear right away for Android users. However, because of some silly Apple rules, all the JavaScript code for every single app on the store has to be packaged inside the Pebble iOS app and released in an update through the App Store. Yes, you read that right. You may want to read it again just to make sure. I’ll wait.
This meant that before I could download my app from the Pebble app store, I had to wait for a few weeks for an update for the Pebble mobile app to show up. There’s no getting around it. Just hope that your app’s release matches the time when the latest Pebble app update is sent to Apple for approval. This is done specifically for app releases every couple of weeks to a month.
Wrapping Up
Now you have a basic overview of the Pebble.js SDK. Delve into the official documentation, hit CloudPebble and start hacking away on your smartwatch app idea! If you ended up finding this post useful - or better yet, made an app after reading this post - let me know in the comments! I would be delighted to read about your experiences.
Good luck, and go design some cool stuff.